Setting up a player
Overview
This article explains how to set up the Screenspace digital signage player on your Wi-Fi network.
To set up the player before moving it to a different location with a different wifi network see the following article: (Set a player up with 2 networks)
Get started with your player in four simple steps:
- Create a configuration file on the Screenspace CMS
- Copy it to your USB drive
- Connect your player to the internet
- Your player will register and be ready to use in your account
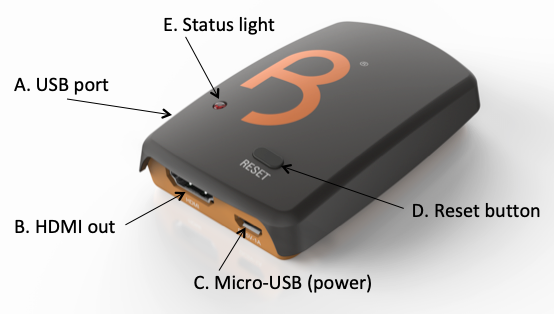
In order to proceed you will need your Screenspace digital signage player (see our image below) and your login details for the Screenspace CMS.
Step 1
- Go to the Screenspace CMS and sign in
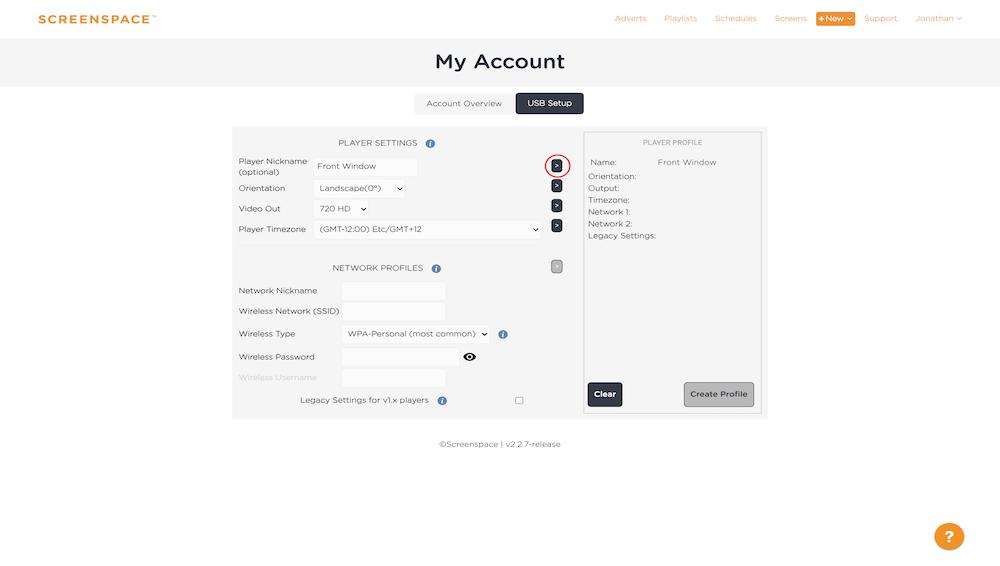
- Click on your name in the top right hand corner, then click ‘My Account’ from the list. (Highlighted in the red oval on the screenshots!)
- Click the tab for USB setup
- (Optional) Enter a nickname - then click the little arrow (highlighted below) to the right of the box to add it to the configuration.
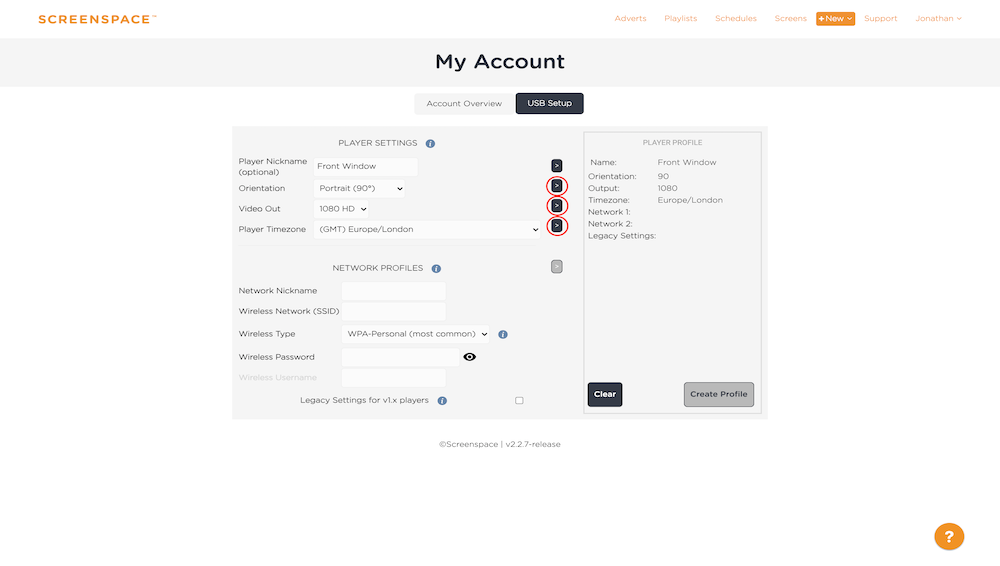
- Select the desired orientation, video output resolution and timezone for the player, (or leave as they are - they can easily be changed again when the player is online) - then click the little arrow to the right of each of them to add the settings to the configuration.
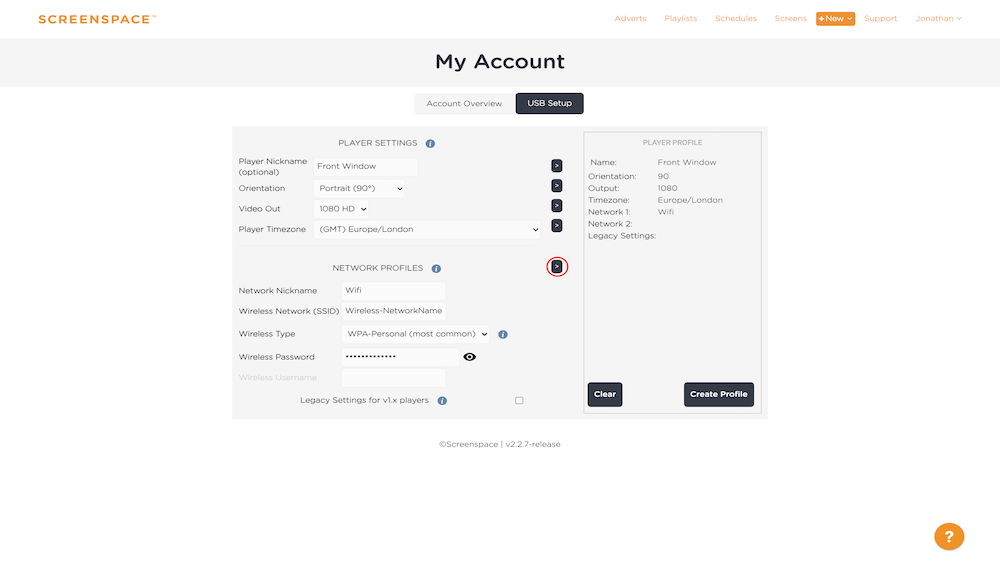
- Fill in the network details, starting with a nickname for the network. Give it a simple nickname, e.g. Home wifi. (Note - this is required for the configuration but is just used to differentiate between networks.)
- For Wireless Network (SSID) put in the name of the network you want to connect the player to.
- Unless you need a username to log in to the wifi, leave the Wireless Type as WPA-Personal.
- If you do need a username to log on to the wifi network select WPA-Enterprise and add the username to the text box.
- Put in the password used to connect to the network.
- Ignore the tick box for legacy settings unless you are using an older V1 player.
- If you are configuring an older V1 player, tick this box and add your Screenspace login details to the boxes that pop up. (Note - for some laptop / PC screen resolutions you may need to zoom out of the page to see these.)
- Click the little arrow to the right of the ‘NETWORK PROFILES’ heading to add all the network details to the new configuration file.
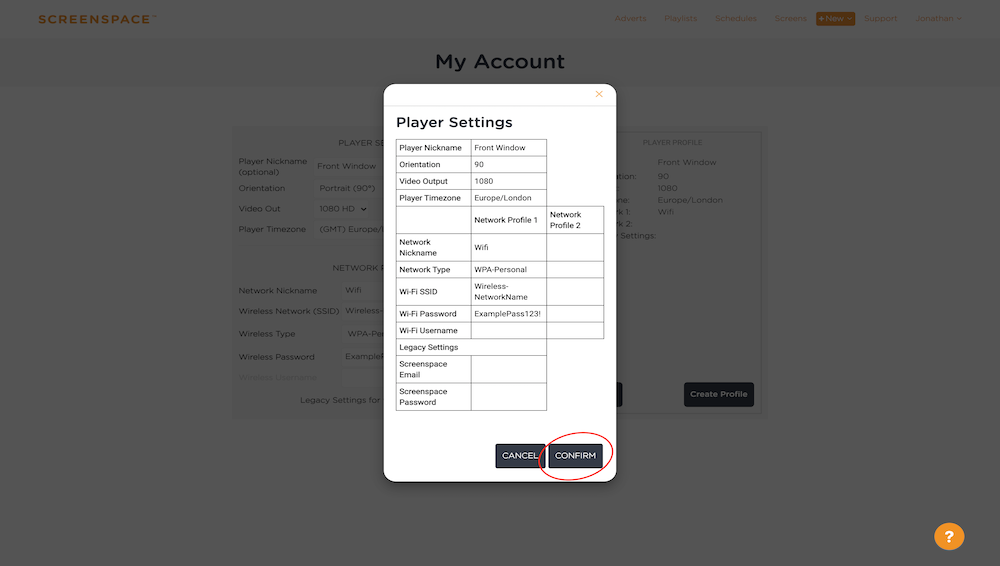
- Now click on 'Create Profile' and check that the details shown in the preview are correct.
- If the details shown are correct, click on ‘Confirm’ and an encrypted file containing your setup details will be downloaded to your computer (player.conf)
Step 2
Transfer the config file from your computer to a clean FAT32 formatted USB drive.
We recommend using a USB drive with an indicator light that flashes to show that your USB drive is being read by the player.
Important:
If you rename the setup file, use alphanumeric characters only and no spaces. If you have downloaded a player.conf file before, make sure that no brackets brackets are appended to the name e.g. player.conf (1).
Only transfer one config file to your USB drive.
Make sure your USB drive is FAT32 formatted. Mac users may need to format their device.
Remove the USB drive after setup.
Step 3
Follow these instructions to connect the player to the wifi specified in the configuration file:
- Connect your screen to your digital signage player using the supplied HDMI cable (B. HDMI out)
- Connect the supplied micro USB power cable to the player (C. Micro-USB power)
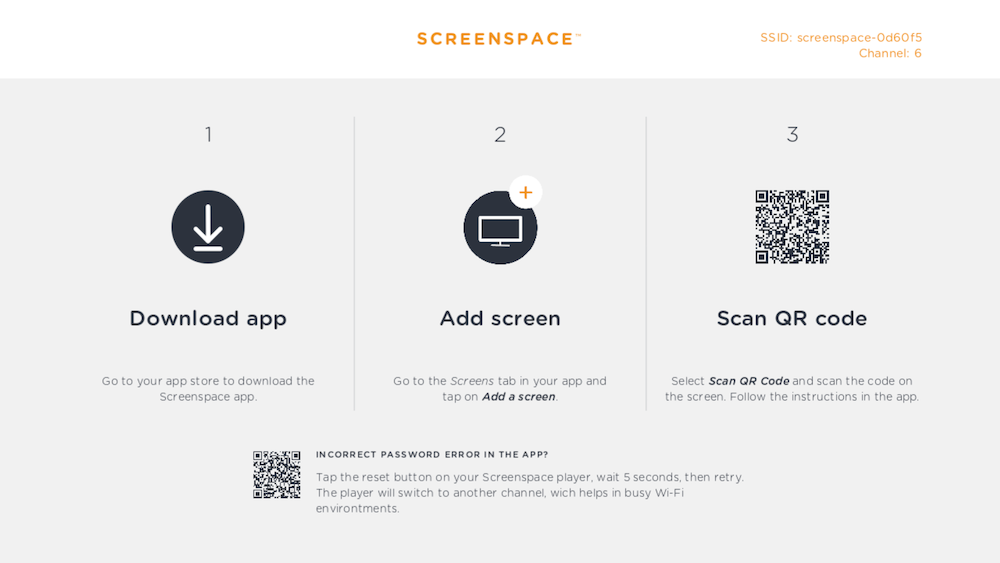
- Allow the player to boot up to the start up screen
- Insert the USB drive into the player's USB port (A. USB port)
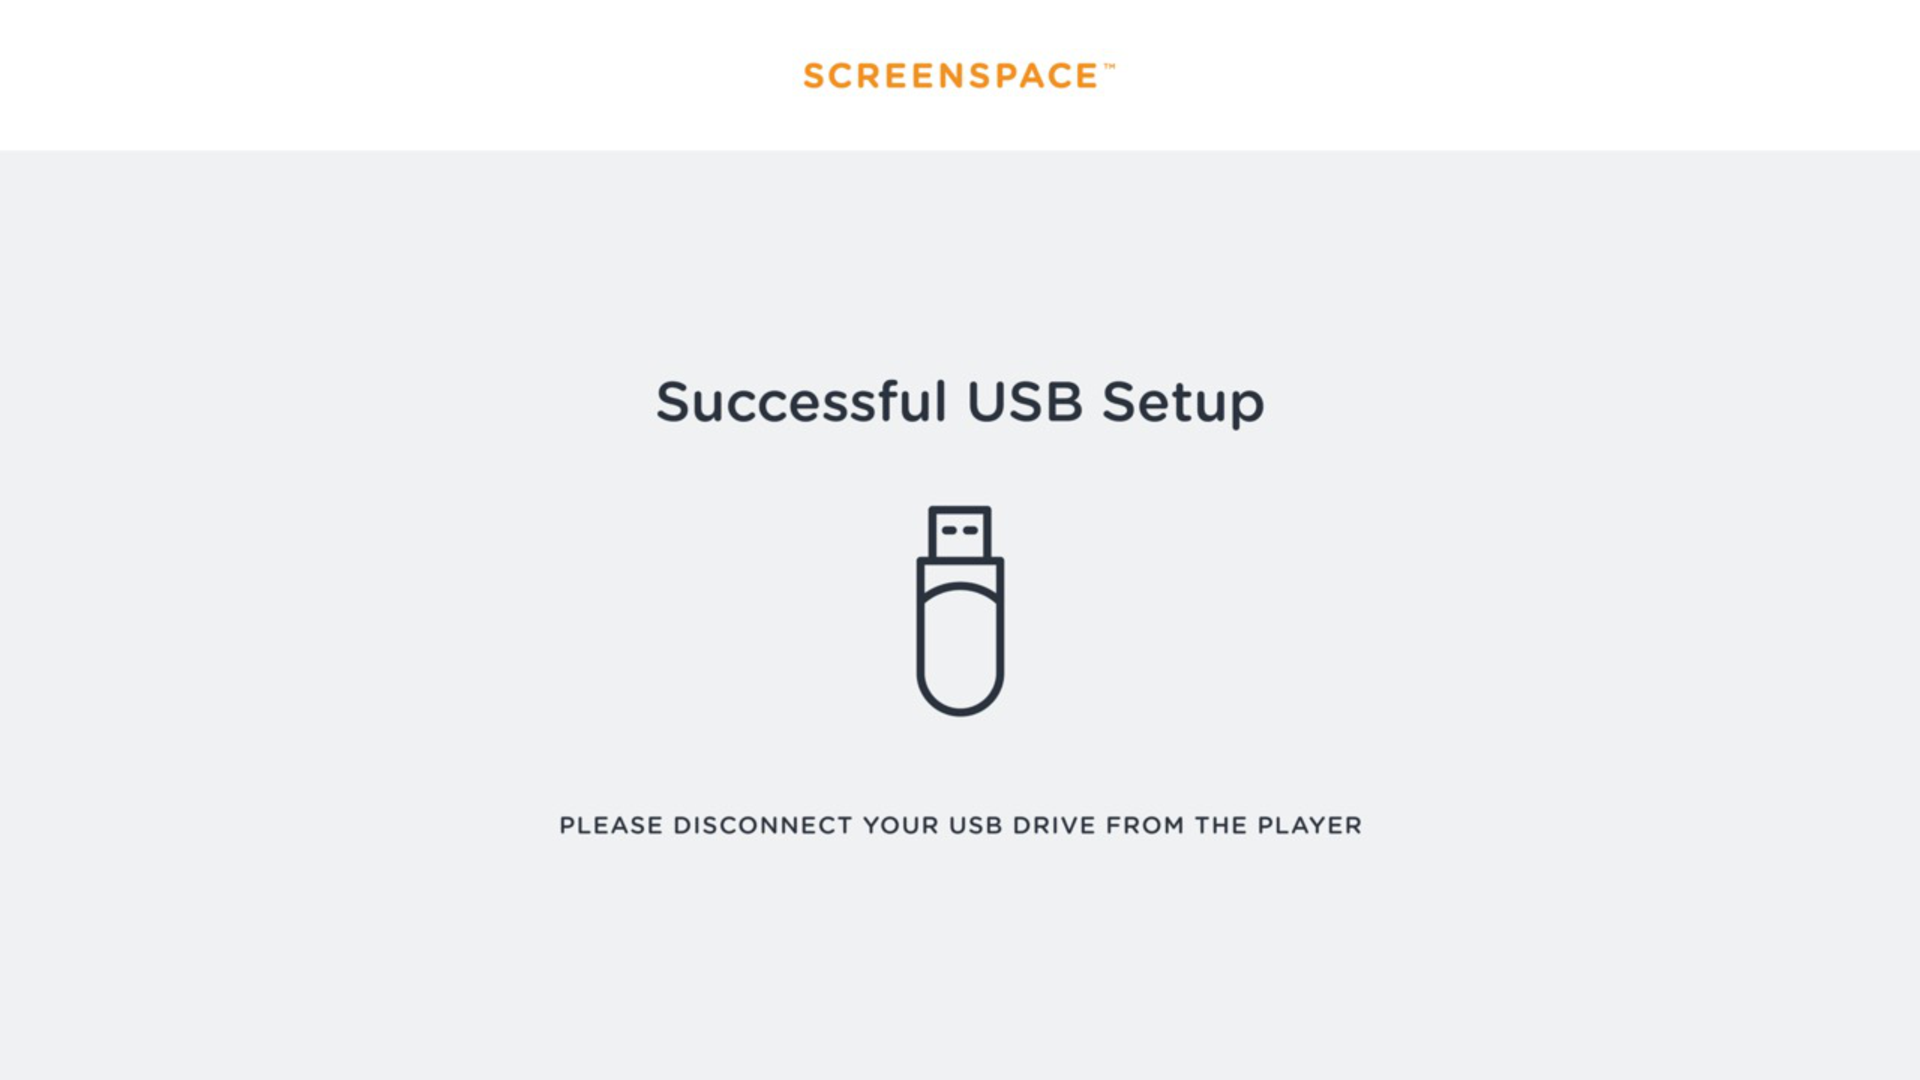
- A message on the screen will confirm that the configuration has been successful.
- If successful, remove the USB drive. Once Screenspace starts, the default advert will play:
Important:
Please be aware that the player needs to be within range to be able to connect to the network.
Step 4
In the Screenspace CMS, head to the screens page. If your player has connected successfully to the wifi and your Screenspace account, it should now appear as online in the CMS.
You can now create and publish content to it directly from the Screenspace CMS.
Troubleshooting
If the player fails to connect and the screen does not appear in the CMS after 60 seconds please manually reboot your player, pressing the reset button for 5 seconds then releasing.
Make sure the USB is FAT32 formatted.
Make sure there are no unusual characters in the configuration file filename.
As the file is encrypted, you won’t be able to double check the network and Screenspace details you entered. If unsure whether you entered the correct details, you can create a new configuration file in the CMS and repeat the process.
If the wifi network details are correct, check that the signal strength for the wifi network is strong enough for the player to connect.
Contact support if the above fails and the player still does not get online.
Changing passwords
If you change your wifi credentials (name OR password), you will need to configure your player again to use the new details. You will need to create a new USB configuration file and go through the steps detailed above.
Changing your screenspace account password will not affect the player so long as the version number is higher than 2.0. Any previous version to that will need to be configured again as above.
Related articles
